If you have been working with github in a team that uses PR’s (especially if you are using Dependabot) then you will need to find a way to manage PR’s across a number of projects. This gets more complex if you are working on a microservices project with 10’s of projects.
The following is a great site that can be used to help you manage this:
Tagless Final allows you to build a subset of the host language which is sound, typesafe and predictable. When designed properly this subset makes it easy to write correct programs and hard to write incorrect ones. In fact, invalid states can’t be expressed at all! Later, the solution written in the hosted language is safely run to return the value to the hosting language.
A key point of this is that “invalid state can’t be expressed”.
The question is then how do you do validation or work with the rest of the world that is not part of your nice clean typesafe utopia?
The samples that were shown during last nights presentation seemed to throw an exception if data were ever to be found to be invalid. This works so far. The downside is to be able to work with anything else would require a wrapping anti-corruption layer. By the time you have tested this integration layer and your provably correct core, you may as well have not used Tagless Final.
Perfect Storm
Some years ago I worked on a C# custom type system. This was designed to allow an invalid state to be represented. The value of this was in having a pluggable validation system that could explain exactly what was wrong in exactly the same way as results would be returned from its rules engine.
The application was defined in terms of Aggregates that formed trees of components. Each component could have properties attached. Each of these properties could be set to a string value. Even an integer age field could be set to “XXX”. This would result in the field being invalid, yet still having a value. This makes it much easier to pass data back to the user for correction. Error messages are more detailed.
These Aggregates had rulesets attached that allowed sophisticated defaults, calculations, and validations to take place. Reference data existed in what would in DDD terms be called a distinct Bounded Context. The downside is that DDD would call this an Anemic Domain Model – but the rulesets are far from that. The rulesets allow far more sophisticated processing to happen – so for example constraints on data could get tighter the further through a process that they get. For example, an order entry system could capture a users shopping list (buy carrots) but during later stages be enriched to include ( 7 carrots, specific variety, weight, and price). The same model would handle both cases yet have different rules applied.
The whole tree of data could be stored in a Work In Progress table until the first set of validation was complete – allowing the user to be presented with the initial data and all of the validated errors.
The type system and validation rules were just one part of the system. It also included code generation to create the model, database, and views. It had a Data Access Layer that could retrieve and store these models to a database. Rules could be imported and exported to a spreadsheet so that the specific rules were known to the user.
Having rules to validate a domain model makes life really easy to work with. Tests using rulesets are trivial. Everything is immutable – you enter data, validate and get a set of validation messages.
The production system that was built with this only had four production bugs in its first three years of use. The validation rulesets meant that it is not possible to store data that was not valid (by a defined set of rules). The same rules had been used to clean the historical data that was imported into the new system so there were no errors in the existing data. It was also possible to load the database at any time to check the current validation which would discover persistence errors (or manual data corrections).
When I started out developing in Delphi the number of dependencies that you took on was significantly lower and slower moving than modern Javascript development. Back then a project would typically have one or two custom libraries added to the Visual Component Library (VCL) and everything else was custom built. These libraries may have got an update every year but could typically be left alone for two or three years. It was fairly straightforward to keep these updated, provided that the supplier stayed in business.
Contrast this to a Node app built with the React Starter Kit. That has over 2000 node modules as dependencies. These are continually being updated and new versions released. Keeping on top of the security fixes and general updates is a major undertaking.
This is where Dependabot comes in. You grant Dependabot access to your git repo and allow it to raise pull requests. It will even merge them for you automatically if you have a suitable build server attached and the build passes.
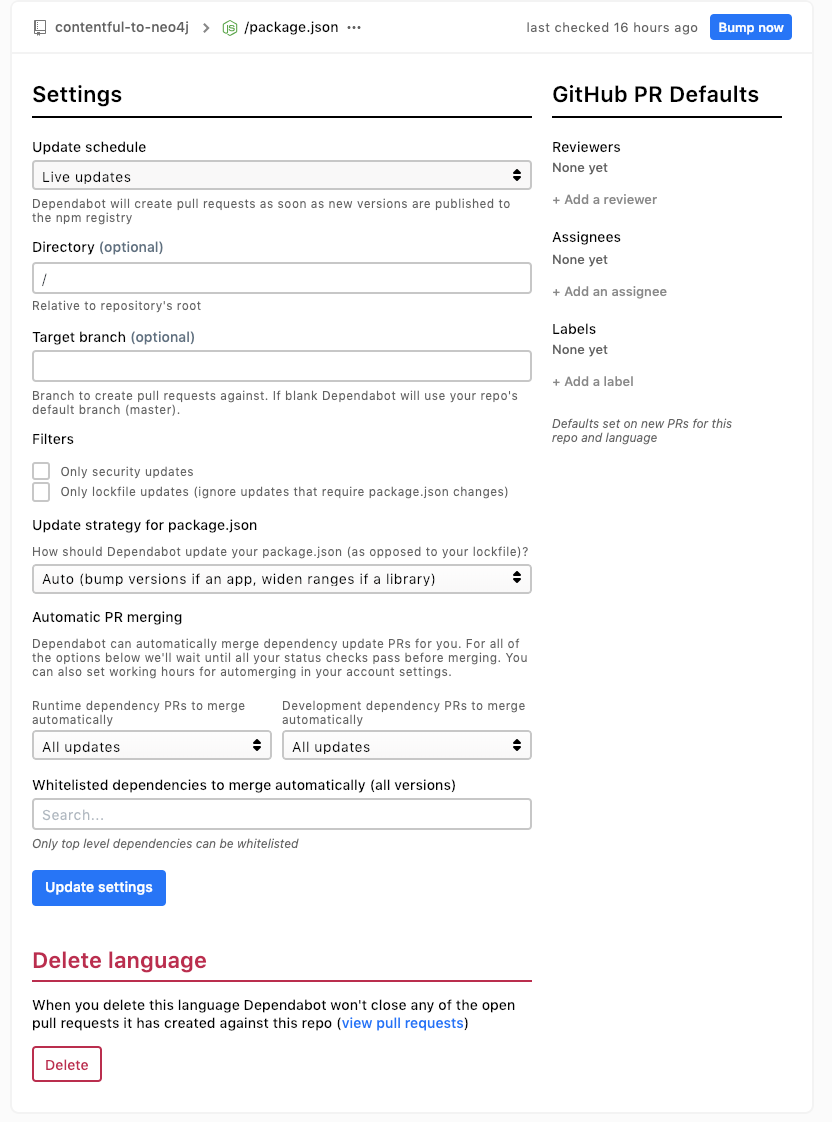
If you click on the gear icon to the side you get the detailed page:
Here I have chosen to take all updates as soon as they are known about and to accept automatic merges once the build server passes.
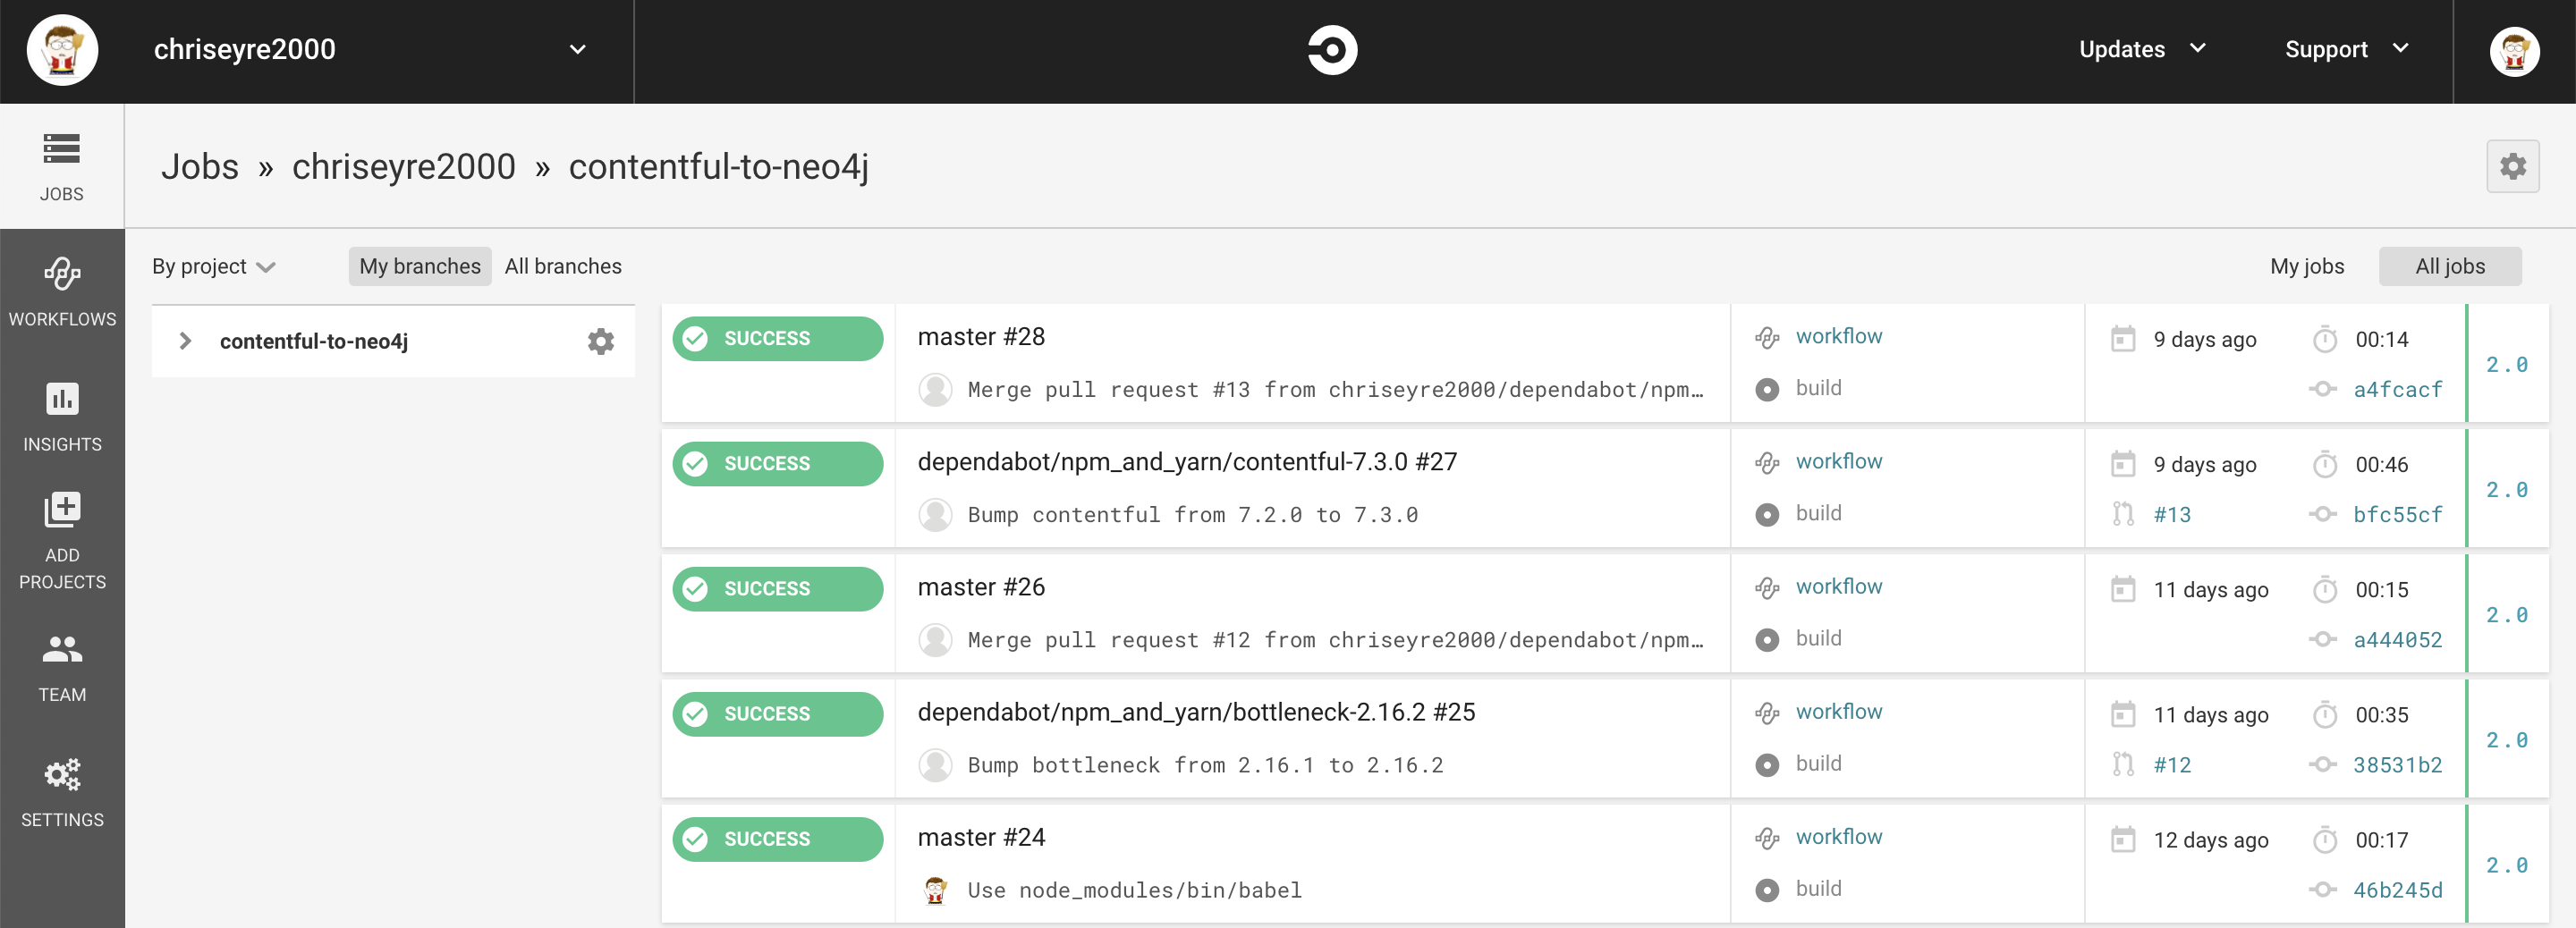
For my build server I use Circle CI. Which is also free for open source projects:
To get this added to Circle I needed to add a .circleci/config.yml file to my project:
# Javascript Node CircleCI 2.0 configuration file # # Check https://circleci.com/docs/2.0/language-javascript/ for more details # version: 2 jobs: build: docker: # specify the version you desire here – image: circleci/node:8.14
# Specify service dependencies here if necessary # CircleCI maintains a library of pre-built images # documented at https://circleci.com/docs/2.0/circleci-images/ # – image: circleci/mongo:3.4.4
working_directory: ~/repo
steps: – checkout
# Download and cache dependencies – restore_cache: keys: – v1-dependencies-{{ checksum “package.json” }} # fallback to using the latest cache if no exact match is found – v1-dependencies-
This is the minimal build that you need to get Dependabot to upgrade your project automatically. This works well for an open source project.
This is what you see in github:
Dependabot messages in github
This is what happens when everything just works.
If you need to intervene you can fix the code on the branch an wait for the build.
You can send dependabot commands via comments on the PR.
@dependatbot merge – asks dependabot to merge and delete the branch.
@dependabot rebase – asks dependabot to rebase the change – very useful if another dependabot change has updated the lock file.
@dependabot recreate – asks dependabot to recreate the PR. This is similar to rebase but will retrigger a build even if there are no changes. Does anyone else have builds with network dependencies (jenkins, browserstack &c)?
Dependabot is also good at working with Jenkins – provided you are using Jenkinsfiles. I am currently working on a large project that has over 40 repositories and we don’t have time to move all of our projects to Jenkinsfiles.
The solution to this is to add a small Jenkinsfile to the project that just runs the unit tests (or as many tests as you can fit). There is a risk that your tests will diverge, but having some tests that run as part of the dependabot process makes your life easier.
The process to making dependabot work for you is:
Ensure that your project has a package.json file (or equivalent for other supported build tool)
Enable dependabot for that project on it’s website.
Enable updates and auto merge as you wish
Enable a CI server
Archive github repos you are not using
Removed dependencies that you don’t need
Fix broken PR’s
Even with this in place, the PR’s will build up for a while.
One of my colleagues wrote a utility to manage a backlog of PR’s:
This allows you to see the outstanding PR’s for a team. You will need to host this yourself somewhere (Heroku works). Using this utility we can see how many PR’s we need to work on. It will take time and you will need to use the above list several times until you have a clean process.
Dependabot is not perfect. It currently works one dependency at a time so linked items that need to stay in sync (react and react-dom) can cause issues. It has the ability to mark a limited time window during which it will automerge (limit it to your core business hours). This can result in 5 builds being triggered for the same project at the same time. Build servers will need to limit concurrency or performance tests will suffer. It will allow you to tame the upgrade treadmill.
I have now found that you can install credo to run globally (apparently this is contentious – it can cause problems if you have different versions installed locally and globally):
git clone git@github.com:rrrene/bunt.git
cd bunt
mix archive.build
mix archive.install
cd –
git clone git@github.com:rrrene/credo.git
cd credo
mix deps.get
mix archive.build
mix archive.install
Once you have that then you can now use:
mix credo *.exs –verbose –strict
It’s also useful if students are having trouble with documentation to submit pull requests to:
I have now finished the testing chapter (Chapter 8).
This was rather frustrating to work with since you have to enter a lot of code before you get to run the tests. This means that it is very easy to make a mistake and spend a lot of time tracking down the issue.
This chapter gives a lot of details on testing a Phoenix application at different levels.
Beware some of the later parts of the chapter – it has a trick problem that is intended to fail and explains on the next page. This can be frustrating if you had previously made a few typos and were running each test as you go.
Recently I have been working on a set of projects that use Docker extensively. I received an error message that appeared to be an out of disk space message. At first I thought it was the host machine that was out of space. On further investigation it was the docker volume that was out of space. It makes sense for containers to have limits it’s just odd to encounter them – when you shut down the containers the volumes remain until you clean them up.
Here are some useful clean up commands for Docker.
I have finally updated the library after the feedback that I received at the joint user group. The code now handles all of the four sample Contentful spaces and empty spaces.
The library used the content type id as the name of the type in Neo4j. There is a mismatch in rules so I have prefixed it with “type_”. This avoids leading numbers.